1 Open any file manager softwares like Seleq, FExplorer.
DOWNLOAD SELEQ FROM THIS POST2 (Search phone memory only)search for the file MMCSTORE in phonememory using seleq software’s inbuilt search or search manually in folders either C:/SYSTEM/DATA or C:/SYSTEM/
Search by giving the search item as mmcstore.* or mmcstore.dat (better manually locate)(Seleq represents phone memory as c drive and mmc as E drive)3 when you find it, send it to your PC by using send option in seleq.
4 on PC, open the file with Notepad, or any word processor
5 There goes your password.Ignore spaces and any unidentificable unknown (non english) charecters.
You can only recover the password of the MMC card set on your phone. If the password for the card was set on another phone you would have to apply the above procedure on the phone which originally set the MMC password. That is to say you can't insert the MMC card into another phone and search the phonememory for the password there.
Monday, October 16, 2006
How to Recover a password from a MMC card on your Mobile
Tuesday, September 26, 2006
Create your own Videos to watch on your Mobile Phone for Free
MyMobileClips is a free service that gives the user the option of converting Google Video / YouTube files to 3gp directly over the net. You can also give it a direct link to any link on the web or upload a video from your computer.
It gives you 2 template sizes Large - 176 x 144 which is for Series60 (S60) devices and a Small - 128 x 96. You type in a password and thats it.
To upload a Google or Youtube Video:
1. You get the url from google video or you tube.
2. You go to the correct upload section
3. Paste the url to the video in the box, and click upload.
4. Check back in a few minutes and your video should be done.
You video link will be available for download 24 hours from conversion.
The videos you upload have a 50MB size limit, but for a free service it works great.
Saturday, September 23, 2006
How to Setup or Host a Web Server on your Nokia Mobile Phone

You can use the web server to retrieve content off the internet for use in your applications. If you are a developer and don't have a server this is a pretty handy solution for you.
- Install the Apache S60 web server and the Python S60 on your Nokia, both are available for Series 60 3rd and 2nd Edtion
- Use Python to create scripts that retreive the data from the internet and pass them to your application.
- Your application makes a call to the local Apache S60 web server running your scripts which retreive the data from the internet.
- You can get all these great technologies from the Nokia Research Center.
Posted by
bulletproof
0
comments
Labels: Apache S60, how to, how-to, mobile, Nokia, python, Python S60, S60, S60 3rd Edition, seriers 60, setup, Software, web server
Tuesday, September 12, 2006
How to convert your Nokia into a spy Phone
Disclaimer
Before you read on, you must read this disclaimer:
I will not be held responsible for any damage you may inflict on your handset, nor any consequences which result from you implementing the techniques you read here.
Please be aware that in many countries, the use of covert surveillance devices is illegal. You must check the legality of your proposed actions before you implement them!!! Useful information on international privacy laws and covert surveillance can be found on this page and also on the BBC website.
Instruction
Nokia handsets (5510, 6110, 6210, 6310 are easier, though you can use 3210, 3310 and 3330, etc). For the purpose of clarity, I’ll assume you’re working with a 6210 or similar handset on which the “pins” are visible at the base of the phone close to where the charger plugs in. Other models, such as the 3310, can also be easily adapted as I will explain later in this guide.
Please note: This method does involve “hacking” the hardware of your handset!
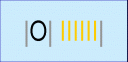
At the base of your phone where the charger plugs in, you should see a row of ‘pins’ which look like the diagram below:
- The “O” is where the charger plugs in to the phone. The grey lines are the long silver pins and the yellow ones are the shorter copper pins.
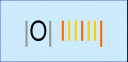
- You need to short pins 3, 6 and 9 (highlighted in red in the diagram below).

- This will cause the handset to “hang” after which the “headset” menu will become available.
- You should then alter the profile settings as in the first method so that “automatic answer” is enabled and the phone is on silent mode.
If you are still concerned that the screen will flash when a call is received, thus drawing attention to the handset, you may want to consider replacing the screen with one which is broken or doesn’t work. Alternatively, you could put a thin piece of paper between the contacts on the screen and the phone so that the screen does not operate, though I wouldn’t recommend this as it could cause permanent damage to the handset! At the moment, I do not know of any other method by which you can stop anything appearing on the screen when a call is received, though I will update this post if I find one!
Information and Legitimate Uses
Other handsets such as the 3310 and 8210 can also be adapted though this would involve dismantling the handset with the use of a torx mobile phone screwdriver in order to access the “charging port” near the base of the phone.
The pins which you need to short on these models are different to those mentioned above!
Instead, you would need to short only pins 4 and 5 which are just visible if you look inside the hole where the hands-free kit would plug in. Once you have access to the pins, it is relatively easy to do. The screwdrivers themselves are not expensive and can be purchased readily on Ebay for a few pounds.
As I have already stated, the use of covert surveillance devices is illegal in many countries. As far as I am aware, in the UK, it is not illegal to poses such a device, but it is illegal to use it to “spy” on another person without their express permission. Legitimate and lawful uses of the “spy phone” would be as a baby monitoring device, for example, or in experimenting with the transmission of sounds on your own property.
Posted by
bulletproof
6
comments
Labels: convert, hidden, how to, listening device, mobile, Nokia, Spy, spy phone, surveillance, tip, tricks
Sunday, September 03, 2006
How to Setup SIP – VoIP on Nokia E Series

Sipgate
First create a SIPGATE account to get a sip number .
After you have created and confirmed your account Click Here and log in to your SipGate account to configure your Nokia E60/61 for your sipgate account.
This is the easiest way.
Gizmo Projects
First you will need to Create a Gizmo Project account
Here is how to configure your Nokia e61\e60 :
Go to Tools - Settings - Connection -SIP settings - Create the
following profile
Profile Name: sipphone
Service Profile: IETF
Default Access point: (your WLAN AP name)
Public user name: sip:1747xxxxxxx@proxy01.sipphone.com
Use Compression: No
Registration: " When needed "
Use Security: No
Proxy Server: sip: proxy01.sipphone.com
Realm: proxy01.sipphone.com
User Name: 1747xxxxxxx
Password: [You SIPPhone password]
Allow loose routing: Yes
Transport Type: TCP
Port: 5060
Registrar Server: sip:proxy01.sipphone.com
Realm: proxy01.sipphone.com
User Name: 1747xxxxxxx
Password: [Your SIPPhone password]
Transport Type: TCP
Port: 5060
Then go to connection - Internet Tel. Settings -
Create a new profile for "sipphone"(1747xxxxxxx), name it "sipphone"
In Connectivity - Internet tel. - Preferred profile - Choose "sipphone"
Then go back to Connection - SIP settings - sipphone and change the Registration from (when needed) to (Always on) now your phone will register to the
Gizmo network.
*If you don’t know your Sip number that starts with 1747 xxxxxx open the Gizmo Project program on your p.c click on edit -> profile.
P.B.Xes
Another way to setup VOIP on your Nokia e61 is by using Gizmo Project and P.B.Xes
# Click HERE to find out more.
Wednesday, August 30, 2006
Nokia Firmware Upgrade Tutorial

On the weekend I posted a details about Nokia relaesing a new tool for reflashing your Nokia, now AllAboutSymbian has a step-by-step tutorial on how to use this nifty, long awaited, nessarsary tool that would have been on my wishlist for the next PC Suite.
Posted by
bulletproof
0
comments
Labels: how to, mobile, Nokia, Nokia PC Suite, reflash, step-by-step, tutorial
Monday, August 28, 2006
Flash Lite 1.1 Tutorial for Sony Ericsson

Chris Petty from Blue Sky North has submitted a Flash Lite 1.1 Tutorial for Sony Ericsson here for all interested in Flash Lite development. It's on the SE developer site. You can download the tutorial with code examples.
Posted by
bulletproof
0
comments
Labels: code samples, development, download, example, Flash Lite, free, how to, mobile, Sony Ericsson, source code, tutorial
Saturday, August 19, 2006
Getting the Current Cell Id using Symbian S60
What you need:
Series 60 SDK
Communicator 9200 SDK version 0.9 or higher
etel.h from Communicator 9200 SDK
etelbgsm.h from Communicator 9200 SDK
Instructions:
Copy etel.h and etelbgsm.h to the \Symbian\6.1\Series60\Epoc32\Include directory.
Link your app to gsmbas.lib and etel.lib.
Use this code:
RBasicGsmPhone phone;
RTelServer server;
User::LeaveIfError( server.Connect() );
// load a phone profile
_LIT(KGsmModuleName, "phonetsy.tsy");
User::LeaveIfError( server.LoadPhoneModule( KGsmModuleName ) );
// initialize the phone object
RTelServer::TPhoneInfo info;
User::LeaveIfError( server.GetPhoneInfo( 0, info ) );
User::LeaveIfError( phone.Open( server, info.iName ) );
MBasicGsmPhoneNetwork::TCurrentNetworkInfo netinfo;
User::LeaveIfError( phone.GetCurrentNetworkInfo( netinfo ) );
Now you should be able to access the fields of
MBasicGsmPhoneNetwork::TCurrentNetworkInfo
which are
.iCellId
.iLocationAreaCode
.iNetworkInfo.iShortName
Once you have grabbed the info use this code to clean up:
phone.Close();
server.UnloadPhoneModule( KGsmModuleName );
server.Close();
All the code should work for the 6600 as well. You have the option of
just compiling with the 1.2 SDK or copying the headers to the 2.0 SDK .
Explore the other functions and data available through these objects as well. The headers should provide you with enough information to figure out what they are. Not all of them are completely implemented. According to a Forum Nokia post you can get to the information by:
- ManufacturerId, Serial No: GetPhoneInfo()
- BER, battery status: GetX - async version
- Signal Strength: SignalStrengthNotification()
Use the NotifyChangeOfCurrentNetwork, so that works as well.
Posted by
bulletproof
0
comments
Labels: alarm clock, C, C++, CLI, code samples, example, how to, how-to, instructions, mobile, S60, SDK, Series 60, source code, Symbian, tutorial
Friday, August 04, 2006
Coding full-screen Symbian C++ applications
There are different methods for making full-screen applications.
1. Cover the system panes
This simple method is used when the application has a traditional view architecture where the view is not a full-screen view. To make the view full screen, call the CCoeControl::SetExtentToWholeScreen() method in the MyView::ConstructL method before the ActivateL() call.
void CHelloWorldPlusAppView::ConstructL(const TRect& aRect)
{
// Create a window for this application view
CreateWindowL();
// Set the window size
SetRect(aRect);
// This view is a full-screen view.
SetExtentToWholeScreen();
// Activate the window, which makes it ready to be drawn
ActivateL();
}
SetExtentToWholeScreen() is not recommended when the application is skinned (from S60 2nd Edition onwards). However, full-screen applications do not want the skin feature anyway, so this should not be a problem.
2. Hiding
The status pane and softkeys can be hidden. The status pane can be hidden from the AppUi with the command
#include
#include
StatusPane()->MakeVisible(EFalse);
Softkeys can be hidden from the AppUi with the
Cba()->MakeVisible(EFalse); command, which activates the “null” softkeys. The default softkeys have no effect after that. To activate the default option menu and the Back key immediately after the keys are pressed, manually handle the key presses. This can be done in the HandleKeyEventL() method as follows:
TKeyResponse CHelloWorldPlusAppUi::HandleKeyEventL( const TKeyEvent& aKeyEvent,TEventCode TEventCode aType)
{// Left or right softkey pressed
if (aType==EEventKeyDown && (aKeyEvent.iScanCode == EStdKeyDevice0 || aKeyEvent.iScanCode == EStdKeyDevice1))
{
Cba()->MakeVisible(ETrue);
}
else
{
Cba()->MakeVisible(EFalse);
}
}return EKeyWasNotConsumed;
}
After that, you can use whole screen when drawing.
Posted by
bulletproof
0
comments
Labels: C++, example, full screen, how to, how-to, mobile, source code, Symbian, tips, tricks
Thursday, July 27, 2006
Signing Error Messages Series 60 (S60) 3rd Edition
If you have been reading discussions at Forum Nokia Developer Discussion Board recently, you may notice there are many questions about signing in S60 3rd Edition. It seems the new security feature in Symbian 9 has led to frustration for some developers.
I would like to share what kind of error messages I have seen when installing signed/unsigned application in S60 3rd Edition phones. There is a hint that explains what may cause a particular message. I may not be able to cover all error messages because I may not have seen all of them.
Read also a nice blog posting from S60 team, Signing applications for S60 3rd Edition.
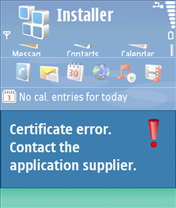
Message: Certificate error. Contact the application supplier.
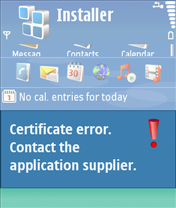
Hint: You may have tried installing unsigned application. Note that signing is mandatory S60 3rd Edition. You can use self-signed certificate or developer certificate from Symbian Signed to sign your application.
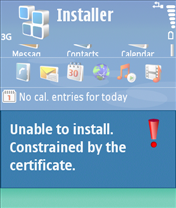
Message: Unable to install. Constrained by the certificate.
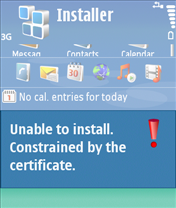
Hint: This message pops up when you attempt to install developer certificate in the unsupported device. The developer certificate from Symbian Signed can only be used in a limited number of devices. Remember that you have to send your IMEIs to Symbian Signed when requesting certificate. You cannot use the certificate in other devices that is not in your IMEIs list.
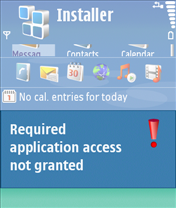
Message: Required application access not granted
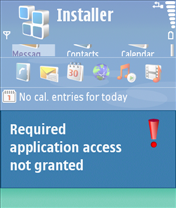
Hint: Check that your certificate can be used to sign all capabilities needed by your application. For example, if you use self-signed certificate, you can only sign basic set capabilities, i.e. NetworkServices, ReadUserData, WriteUserData, LocalServices and UserEnvironment. If your application requires one of the extended capabilities, for example SwEvent, you cannot sign it with self-signed certificate. In this case, apply for developer certificates from Symbian Signed.
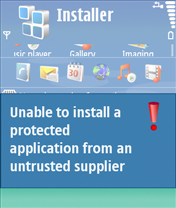
Message: Unable to install a protected application from an untrusted supplier
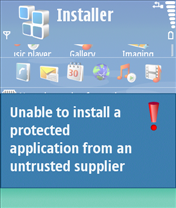
Hint: If you use self-signed certificate, make sure that your application uses unprotected UID, i.e. 0xA0000000 - 0xAFFFFFFF. If you use protected UID (0×20000000 - 0×2FFFFFFF) or legacy UID (0×10000000 - 0×1FFFFFFF), you will get this message.
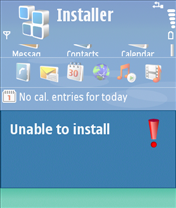
Message: Unable to install
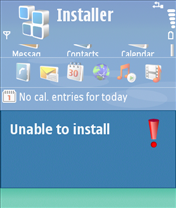
Hint: This message may come up when your installation file (.sis/.sisx) copies files to other application’s private folder, i.e. \private\uid. Note that Symbian 9 introduces data caging concept, it means you don’t have access to other application’s private folder.
Posted by
bulletproof
3
comments
Labels: application, Certificate error, Forum Nokia, how to, how-to, IMEI code, IMEI Number, mobile, resource, S60 3rd Edition, signing error, SIS, SIS FIle, Symbian, Symbian 9.0, Symbian OS, tips, tricks
Nokia N91 - Adding Album Art to Your Music
I've recently come across some topics and questions regarding the display of Album Art in the N91 Music Player. Depending on where you get your music from the album art isn't attached to a file... unless of course its downloaded from iTunes, but that won't help us here.
I haven't found a more simple method but I will share my solution. First of all, I get my music from AllTunes.com (the guys at AAS rave about this). I usually just copy the image of the album and save it to my laptop. Once I've downloaded the album using Nokia's Music Manager I can now add my album art.
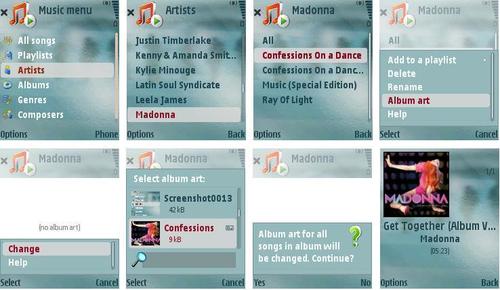
Next, open your Music Player and select the artist. Select the Album or Artist that you wish to add the album art to. Select options and go to Album Art. Select options again and go to change. This will then take you to your gallery where your image is stored. Select the image and viola' your done!
This is the method that I use but by all means, if there is an easier way please feel free to share.
Via [Darla Mack]
Monday, July 17, 2006
UrlEncoder for J2ME
A poor mans UrlEncoder for MIDP(J2ME) which can easily be extended by adding
more items to switch statement in the urlEncode method.
/*
* (C) Serkan Azmi. 2001
* All rights reserved
* The material(s) may be used and/or copied only with the written permission
* of Serkan Azmi. or in accordance with the terms and
* conditions stipulated in any agreement/contract under which
* the material(s) have been supplied.
*/
public class UrlParamEncoder {
String szUrlParam = null;
public UrlParamEncoder() {
}
private void prepAdd() {
if (szUrlParam == null) {
szUrlParam = new String();
}
else {
szUrlParam += "&";
}
}
public void addParam(String szName, String szValue) {
prepAdd();
szUrlParam += urlEncode(szName) + "=" + urlEncode(szValue);
}
public void addParam(String szName, int nValue) {
prepAdd();
szUrlParam += urlEncode(szName) + "=" + urlEncode(Integer.toString(nValue));
}
public void addParam(String szName, long lValue) {
prepAdd();
szUrlParam += urlEncode(szName) + "=" + urlEncode(Long.toString(lValue));
}
public void addParam(String szName, boolean bValue) {
prepAdd();
Boolean boolValue = new Boolean(bValue);
szUrlParam += urlEncode(szName) + "=" + urlEncode(boolValue.toString());
}
private String urlEncode(String s) {
StringBuffer sb = new StringBuffer();
for (int i = 0; i <>
switch (s.charAt(i)) {
case ' ':
sb.append("%20");
break;
case '+':
sb.append("%2b");
break;
case '\'':
sb.append("%27");
break;
case '<':
sb.append("%3c");
break;
case '>':
sb.append("%3e");
break;
case '#':
sb.append("%23");
break;
case '%':
sb.append("%25");
break;
case '{':
sb.append("%7b");
break;
case '}':
sb.append("%7d");
break;
case '\\':
sb.append("%5c");
break;
case '^':
sb.append("%5e");
break;
case '~':
sb.append("%73");
break;
case '[':
sb.append("%5b");
break;
case ']':
sb.append("%5d");
break;
default:
sb.append(s.charAt(i));
break;
}
}
return sb.toString();
}
public String toString() {
return szUrlParam;
}
}
Posted by
bulletproof
0
comments
Labels: developer, development, example, how to, how-to, J2ME, JAVA, MIDlet, MIDP, mobile, source code, tip, UrlEncoder
Sunday, July 16, 2006
Most Important 12 Sony Ericsson UIQ 3 development tips
When developing UIQ 3 C++ applications for Sony Ericsson UIQ 3 phones, the following should be considered:
- Always favor CQikXXX classes over CEikXXX classes. Derive your AppUi from CQikAppUi (Qikon) rather than CEikAppUi .
- Ensure that your application is “theme aware”. Use logical colors to draw application controls and propagate color scheme change messages through your application.
- Make sure that application icons in three different sizes are defined for display on the device.
- Prefer the Symbian exception handling before the standard C++ language exception handling.
- Do not block a ViewActivatedL - any potentially long running action chained off a view activation should be done async. Otherwise the system may kill your application for being too sluggish.
- Be conservative in stack usage, including the implementation of recursive algorithms.
- Follow the UIQ 3 style guidelines.
- Have some way to call Exit from your application in debug builds. In the emulator, this will cause a panic if there is any memory leakage. It’s much better to find memory leaks during development in the emulator, than at the end of development, when testing in the phone is done.
- Do not run timers continuously in the background because it seriously affects battery life.
- Make your code device independent when possible. Do not “hard code” screen sizes, colour depths, font sizes, and so on, instead use Symbian OS APIs to get details of device characteristics and capa-bilities so that your application will run on the widest possible ranges of devices including any future Symbian/UIQ based Sony Ericsson phones.
- Avoid using local TBuf objects. They consume valuable stack space, which is extremely limited on a symbian device, and behave very differently compared to in the emulator. If you need more than a few hundred bytes allocated to a TBuf , then use a HBuf which is allocated on the Heap instead. Always remember to destroy the HBuf after it is finished with. The reasons for stack exhaustion are almost impossible to trace on the real target, they appear as random, unexplained crashes.
- Since applications can be installed either in phone memory or on Memory Stick, avoid using absolute paths for file locations in your code.
Posted by
bulletproof
0
comments
Labels: C++, developer, development, how to, how-to, mobile, source code, tips, tricks, UIQ 3.X
Friday, July 14, 2006
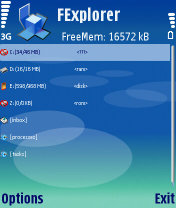
File Explorer Tricks for Series60 phones

* How to reset the operator logo :
1) go to the following dir :
c:\system\apps\phone\oplogo
1) delete any file in this directory
3) restart the phone
* to make a screenshot on a Nokia 3650, 6600 :
1) use the pencil key + '0'
2) the screenshot is saved in C:\NOKIA\IMAGES\FE_img\
* to make a screenshot on a SX1 :
1) use the shift key + '0'
2) the screenshot is saved in C:\NOKIA\IMAGES\FE_img\
* remember, there are some shortcuts :
* running exe files :
With version 1.13,in the directory of FExplorer a console exe file : EXETEST.EXE (you can run it), the purpose is only to test if FExplorer can run EXE files on your phone.
* restoring the last path in views :
After leaving the 'about box', 'settings' or the 'editor' view, if FExplorer return to the root directory, check that the 'save last path' in the settings is 'ON', not only this settings is used when leaving FExplorer but i's also used in all the differents 'views' (06/03/2005).
* how to switch between the text/hex viewer :
Simply, go to the settings and choose the viewer type : text or hex (06/05/2005).
Posted by
bulletproof
1 comments
Labels: application, EXE files, FExplorer, File Explorer, hex, hex viewer, how to, how-to, mobile, operator logo, S60, screen capture, Series60, Siemens SX1, tips, tricks
Thursday, July 13, 2006
J2ME Image Loader Source Code
public Image getImageFromUrl(String url)
{
InputStream is = null;
HttpConnection hc = null;
Image img = null;
try {
hc = (HttpConnection)Connector.open(url);
// If we've got a connection?
if (hc.getResponseCode() == HttpConnection.HTTP_OK) {
// Open the stream
is = hc.openInputStream();
// How big is the file?
int len = (int)hc.getLength();
// Create a byte array that size
byte[] data = new byte[len];
// Read in the file
int actual = is.read(data);
// Create an image from the raw data
img = Image.createImage(data, 0, len);
}
} catch (Exception e) {
System.out.println("IO Exception+"+e);
} finally {
if (is != null) {
try {
is.close();
}
catch (Exception e) { }
}
if (c != null)
{
try {
c.close();
}
catch (Exception e) { }
}
return img;
}
Posted by
bulletproof
1 comments
Labels: code samples, developer, example, how to, how-to, image, mobile, resource, source code
Wednesday, July 12, 2006
MIDlet About Command Button Example
Here is some code I wrote back in 2002 which will display a copyright character \251 , specified image located in the resoures, checkes for device capabilitities ie. if it is able to render in color or black and white.
You can modify the About class to have parameters for the copyright string and icon variables.
public class X extends javax.microedition.midlet.MIDlet implements CommandListener, Runnable {
...
/** command about */
private Command cmdAbout = null;
...
...
cmdAbout = new Command("About", Command.HELP, 30);
anyForm.addCommand(cmdAbout);
...
public void commandAction(Command cmd, Displayable d) {
...
if (cmd == cmdAbout) {
About.showAbout(display);
}
....
/*
* @(#)About.java
* (C) Copyright Serkan Azmi. 2001
* All rights reserved
* The material(s) may be used and/or copied only with the written permission
* of Serkan Azmi. or in accordance with the terms and
* conditions stipulated in any agreement/contract under which
* the material(s) have been supplied.
*
* Created on 18 September 2001, 08:44
*/
import javax.microedition.lcdui.*;
/**
* Typical about box with a string and an image.
*/
public class About {
private static String copyright =
"\251 Serkan Azmi 2002";
private Displayable previous; // the previous screen to go back to
private About() {}; // no instances
/**
* Put up the About box and when the use click ok return
* to the previous screen.
*/
public static void showAbout(Display display) {
Alert alert = new Alert("About");
alert.setTimeout(Alert.FOREVER);
if (display.numColors() > 2) {
String icon = (display.isColor()) ?
"/icons/NAME_OF_APPLICATION_ICON.png" : "/icons/NAME_OF_APPLICATION_ICON_IN_GREYSCALE.png";
try {
Image image = Image.createImage(icon);
alert.setImage(image);
} catch (java.io.IOException x) {
// just don't append the image.
}
}
Runtime runtime = Runtime.getRuntime();
runtime.gc();
alert.setString(copyright);
display.setCurrent(alert);
}
}
Posted by
bulletproof
0
comments
Labels: code samples, copyright, developer, example, how to, how-to, J2ME, JAVA, JavaME, MIDlet, MIDP, mobile, source code
Free J2ME emulator that runs in a webpage

Do you program Java ME (formerly J2ME)? If so, you might like to know about a free J2ME emulator that you can embed into your web pages.
To use mPowerPlayer start with the URL…
http://webstart.mpowerplayer.com/
All you need to do is append your URL and .jnlpto and that’s it!
For example,
http://ota.mpowers.net/piranha/pna-us.jadbecomes
http://webstart.mpowerplayer.com/ota.mpowers.net/piranha/pna-us.jad.jnlp
Posted by
bulletproof
0
comments
Labels: developer, device emulator, free, how to, how-to, mobile, online emulator, resource, service, tip
Monday, July 10, 2006
MIDlet Splash Screen Example
package display;
import java.io.IOException;
import javax.microedition.lcdui.*;
/**
* A simple splash screen.
*
*/
public class SplashScreen
extends Canvas
implements Runnable {
private Image mImage;
private Display mDisplay;
private Displayable mNextDisplayable;
/**
* Create a newSplashScreen. The constructor
* attempts to load the named image and begins a timeout
* thread. The splash screen can be dismissed with a key
* press, a pointer press, or a timeout (hardcoded at
* three seconds).
*
* @param name the path of the image resource to load
* @param display the application'sDisplay
* @param next the screen to be shown after the splash
*/
public SplashScreen(String name,
Display display, Displayable next) throws IOException {
mImage = Image.createImage(name);
mDisplay = display;
mNextDisplayable = next;
Thread t = new Thread(this);
t.start();
}
/**
* Paints the image centered on the screen.
*/
public void paint(Graphics g) {
int width = getWidth();
int height = getHeight();
g.drawImage(mImage, width / 2, height / 2,
Graphics.HCENTER | Graphics.VCENTER);
}
/**
* Dismisses the splash screen.
*/
public void dismiss() {
if (isShown())
mDisplay.setCurrent(mNextDisplayable);
}
/**
* This method is used internally with a timeout thread.
*/
public void run() {
try { Thread.sleep(3000); }
catch (InterruptedException ie) {}
dismiss();
}
/**
* A key release event causes thedismiss()
* method to be called.
*/
public void keyReleased(int keyCode) { dismiss(); }
/**
* A pointer release event causes thedismiss()
* method to be called.
*/
public void pointerReleased(int x, int y) { dismiss(); }
}
Posted by
bulletproof
3
comments
Labels: code samples, developer, example, how to, how-to, J2ME, JAVA, MIDlet, MIDP, mobile, resource, source code, splash screen
Sunday, July 09, 2006
Getting the IMEI code from Series 40 3rd Edition devices
I searched in internet something about problem with application which I code now, and found interesting trick on Nokia forum . You can get the IMEI code from Series 40 3rd Edition devices in your midlet
All you need - to retrieve the system property “com.nokia.mid.imei“. This works in some of the latest Series 40 3rd Edition devices. Of course, your MIDlet should be signed before using such system property, without it you can test this on emulator
Posted by
bulletproof
0
comments
Labels: developer, how to, IMEI code, IMEI Number, J2ME, MIDlet, mobile, Nokia Phone Software Updater, Series 40, Series 40 3rd Edition, source code, tip, trick, tricks
Saturday, July 08, 2006
Constructing a Mobile Game Skeleton
You will learn here how to build a very simple MIDlet called Skeleton that displays information about the mobile phone as lines of text onscreen. Understanding and building upon this sample MIDlet will allow you to code even more complex games.
Exploring the J2ME APIs
Before getting into the coding details of your first mobile phone program, you need a quick primer on the APIs that go into building MIDlets. The MIDP (Mobile Information Device Profile) specification is a set of rules that describe the capabilities and limitations of Java with respect to mobile devices. A significant aspect of these capabilities and limitations is the standard set of classes and interfaces that are available for MIDlet programming. Although the MIDP specification provides a detailed description of the API available for MIDlet development, an additional API is provided by the CLDC (Connected Limited Device Configuration). The MIDP API builds on the CLDC API to provide classes and interfaces that are more specific to mobile information devices. You can think of the CLDC as providing a general Java API for networked devices, whereas the MIDP goes a step further in providing a more detailed API that fills in the specifics left out of the CLDC API for compact wireless devices such as phones and pagers.
Why should you care about any of these specifications and APIs? The CLDC and MIDP specifications are important because they explicitly define what classes and interfaces can be used to build MIDlets. Mobile devices are nimble machines that don't have the luxury of megabytes of memory to pack full of application overhead. Knowing this, Sun had to figure out a way to provide a core set of functionality with a useful feature set but without bloating the runtime requirements of mobile devices. Their answer is the two-tier approach that consists of a configuration layered with a more detailed profile. The CLDC API describes the core classes and interfaces required by a general network device, whereas the MIDP API adds the classes and interfaces required by a mobile information device such as a mobile phone
Keep in mind that although the CLDC and MIDP APIs have been carefully thought out to trade off functionality against the memory and resource constraints of mobile devices, they will inevitably come up short in certain situations. This means that you will sometimes have to work a little harder as a MIDlet game developer because you don't have as rich an API to work with as you would if you were doing traditional game programming.
The CLDC API
The majority of the classes in the CLDC API are directly included from the standard J2SE API. These classes and interfaces are practically identical to those that you may be familiar with from traditional Java programming. This portion of the CLDC API is located in packages with familiar J2SE names such as java.lang and java.util. In addition to the classes and interfaces that are borrowed directly from the J2SE API, a few interfaces are unique to the CLDC API. These interfaces deal primarily with networking, which is an area of the J2SE API that is particularly difficult to scale down for the needs of network devices.
The CLDC defines a set of interfaces that facilitate generic networking, and leaves the specifics of implementing these interfaces to the MIDP API. So the CLDC API is logically divided into two parts:
A series of packages that serve as a subset of the J2SE API
A set of generic networking interfaces
The bulk of the classes and interfaces in the CLDC API are inherited directly from the J2SE API. J2ME requires that any classes or interfaces inherited directly from J2SE must not be changed in any way, which means that the methods and fields are identical to the versions found in J2SE. This makes it easier to learn how to program in J2ME, and it also makes Java code more portable between J2SE and J2ME.
Posted by
bulletproof
0
comments
Labels: code samples, game developers, how to, J2ME, MIDlet, MIDP, mobile, source code